
18 Errors And Solutions In The Installation Of Artificial Grass
Many people are surprised to learn that when installing artificial grass, a lot of effort is required. That's why we usually recommend that you seek professional help to install your artificial turf. Their experience and expertise will make artificial turf longer lasting and better performing.
But, understandably, many people choose to install their own artificial grass to keep costs down or to experience the joy of DIY. Mistakes can be avoided as long as you learn as much as possible about the different techniques and tools required for artificial grass installation. To help you avoid the pitfalls we often see clients trying to install their own fake lawns, we've compiled a list of the most common installation mistakes and, more importantly, how to fix them.
Mistake 1: Not enough depth is reserved
Placing artificial grass directly over soil or existing grass will not work. The end result will be a patch of grass that looks extremely uneven. The key to using artificial grass for a long time is to lay the ground correctly and to choose the right artificial grass. We recommend cleaning at least 75mm (3 inches) below the finished lawn height, including removing all existing grass and weeds. For poorly drained areas, we recommend excavation to 100mm (4 inches). To check the dig depth, pull a string on the lawn and measure the distance between the string and the subgrade/soil level.
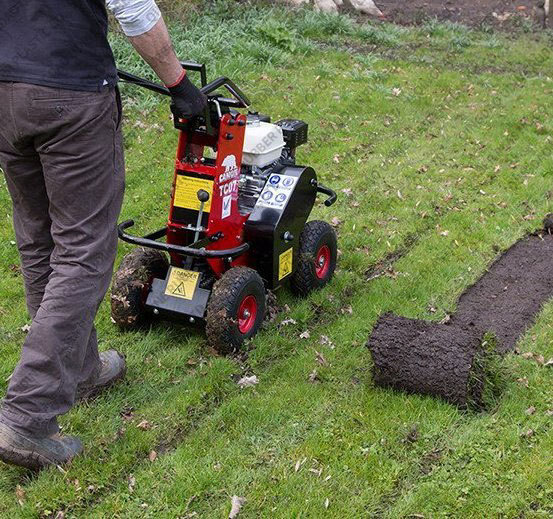
To make the digging process as quick and easy as possible, we highly recommend hiring a lawnmower from your local tool rental store. The cutting blade can be adjusted to facilitate the handling of the existing turf in the coil.
Solution
● Excavation to a minimum depth of 75mm
● Hire a lawn mower to deal with weeds
Mistake 2: Failure to clear soft spots in roadbed
After excavating the existing lawn, check the subgrade/soil for soft spots.Soft spots are areas where the ground begins to sink under your body weight. You can test this by walking on bare ground.If you find your feet are sinking into the ground, you should excavate the problem area and backfill with subbase material.If the soft spots are not removed, it may cause some areas of the lawn to sink.
Solution
● Remove all soft spots during excavation work.Remember, removing too much is better than removing too little.
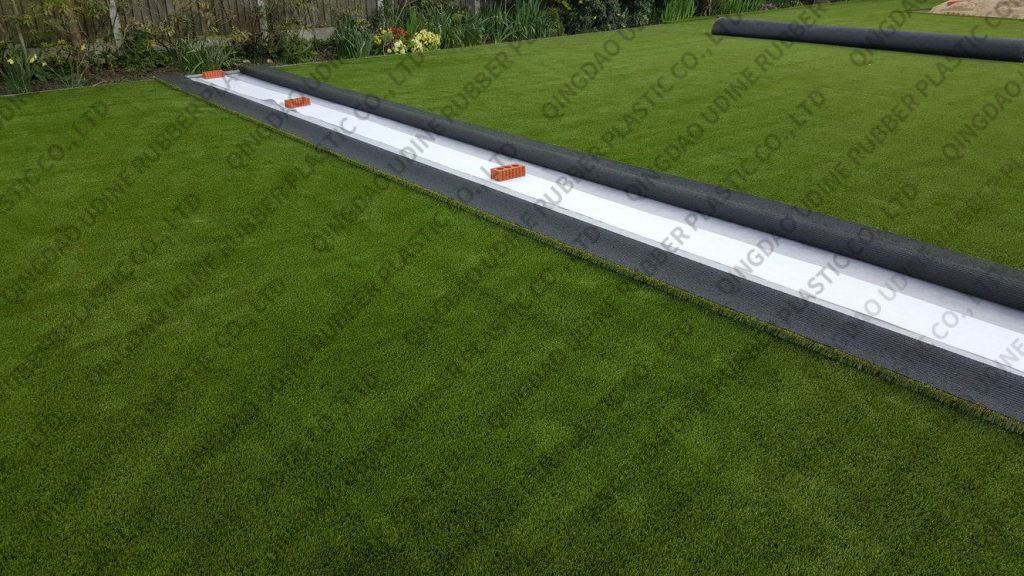
Mistake 3: Weeding film is not installed
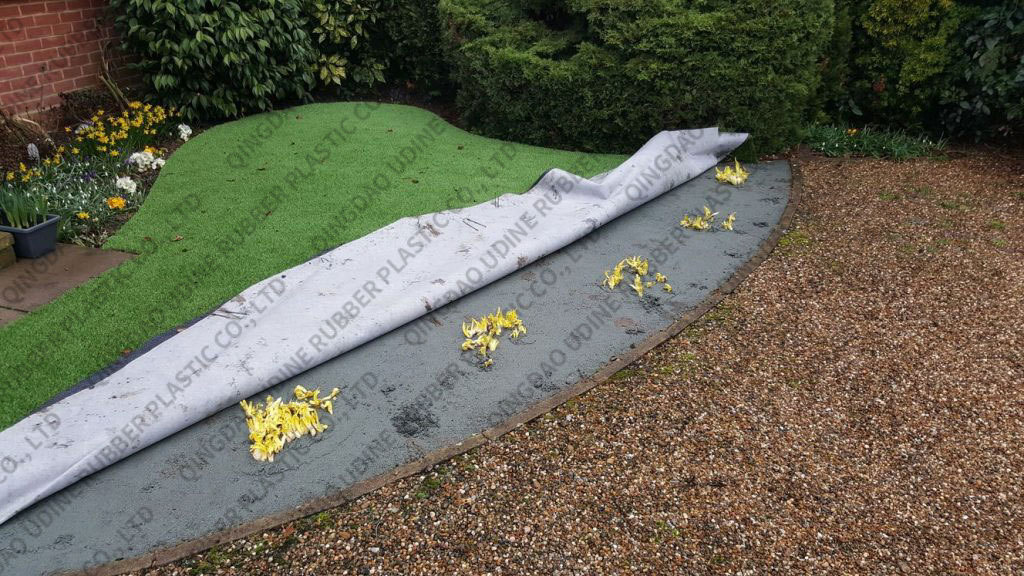
Without a weed film, there's a good chance you'll have weeds growing on your fake lawn. One of the main benefits of owning artificial grass is that you no longer have to deal with weeds. To prevent weed growth, we strongly recommend installing weed film on the roadbed. The image below shows what happens if weed membrane is not installed on the roadbed. As an extra line of defense, we also recommend installing a second weed membrane on top of the laying layer, just below the artificial grass.
Solution
● Install weed film on the subgrade (soil) to prevent weed growth.
Mistake 4: Insufficient Subbase Installation
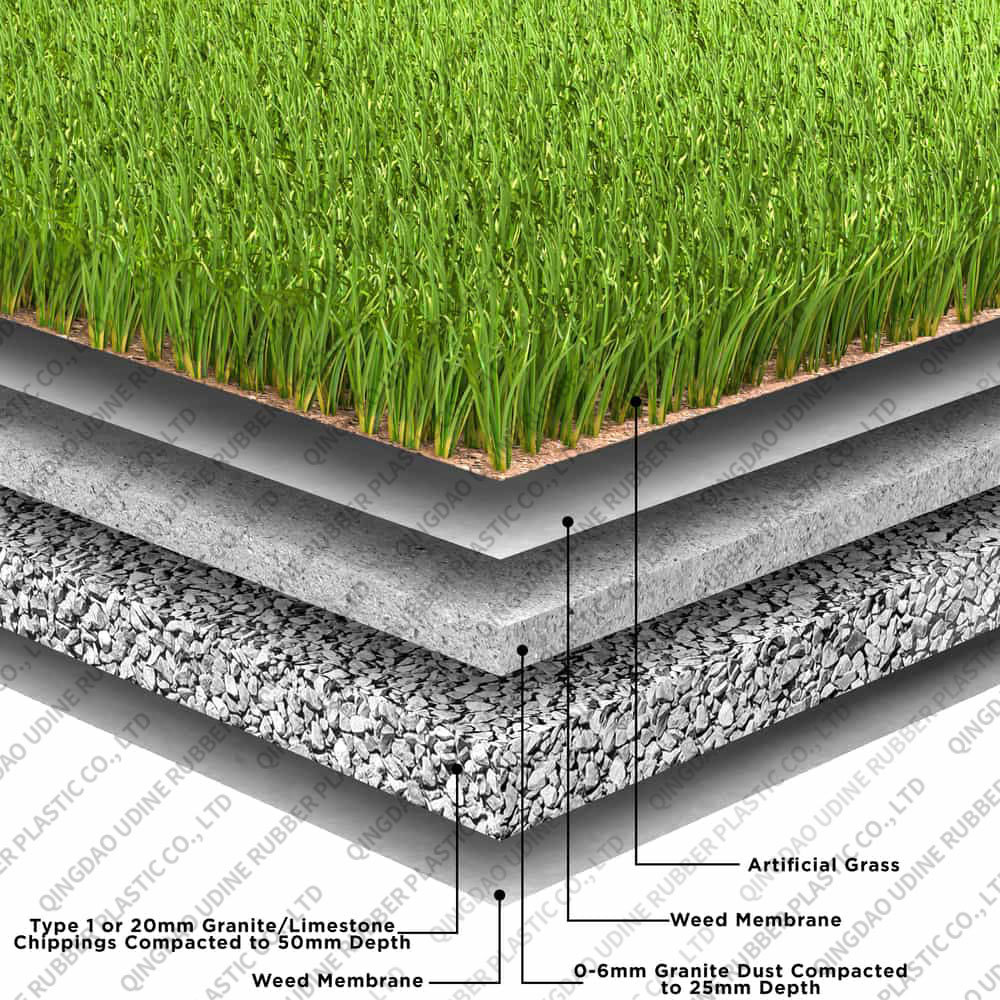
When installing artificial grass, two layers of aggregate need to be installed before the grass is laid.The first is the sub-base. The subbase will give your artificial turf the strength to handle the weight of foot traffic.In general, we recommend using at least 50mm of MOT Type 1 for the sublayer. For poorly drained gardens, you may want to consider installing 50mm of 12mm granite or limestone chips to create a permeable subbase.For areas that require heavy use, you may want to consider installing a 75mm subbase.
Solution
● Install at least 50mm of MOT type 1 as a sub-base.
Mistake 5: Using sharp sand as a laying layer
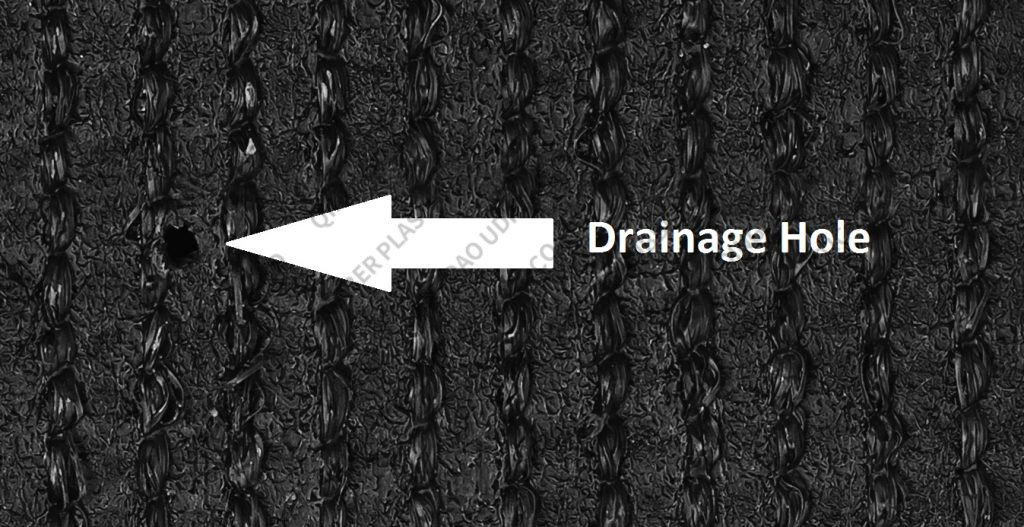
The next layer of aggregate that should be laid is called the laying layer. The laying layer provides the grass with a flat, smooth, uniform surface. It is critical that you install a paving layer that can withstand foot traffic and rainfall. Unfortunately, many installers still use compacted, sharp sand to form the subbase, but the problem with using sand is that they don't bond particularly well, causing the pavement to move, resulting in uneven turf.Another problem with sharp sand is that it will eventually wash away.The backing of artificial grass has perforations that allow water to drain off the surface of the turf. This water will gradually wash away the sharp sand under the fake grass, again causing the lawn to look uneven.
We recommend that you install a 25mm deep lay layer consisting of 0-6mm granite or limestone dust, sometimes called grano (use whatever material you can find locally).
Granite or limestone dust creates a stronger, more wear-resistant lay-up that provides a higher-quality finish for sharp sands.
Solution
● Install a 25mm lay-up layer consisting of granite or limestone dust.
Mistake 6: Insufficient Subbase and Paved Layers
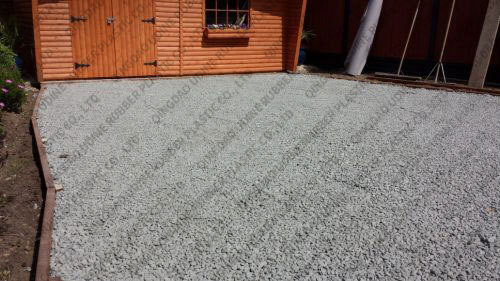
After leveling the subbase, the next step is to ensure that the subbase is fully compacted before spreading the ply material. The only way is to use a vibratory plate compactor. If you're doing a DIY installation, you'll find that you can rent one from your local tool rental store for relatively little money and a quick end to the step.
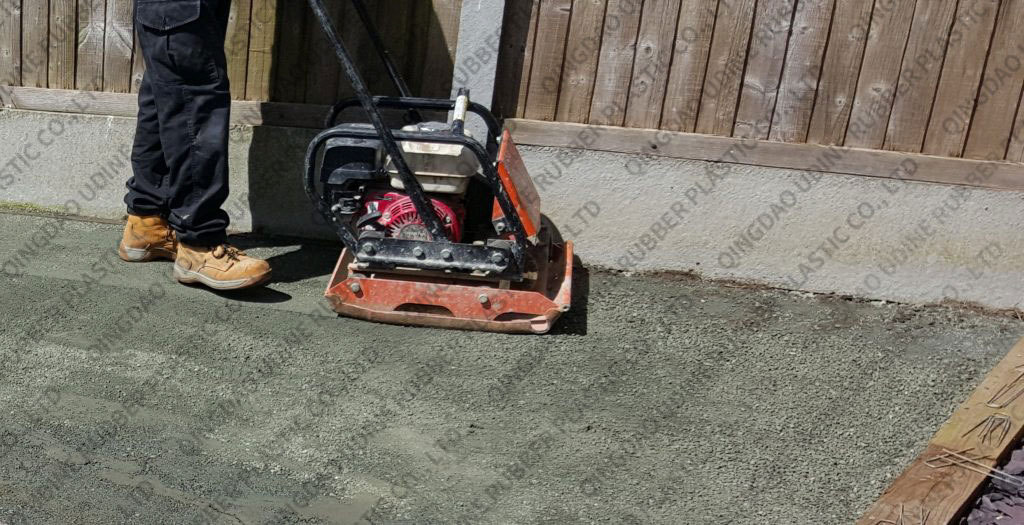
When using a flatbed compactor, make sure the entire area is thoroughly compacted by moving it up and down, left and right on the lawn. Otherwise, your lawn surface will have an uneven finish. Don't be too hasty to bring the flatbed compactor back to the rental shop because you'll need to use it again during the laying process.
Bonus tip: You'll find it easier if you use a garden hose to lightly sprinkle water over the granite or limestone dust before compacting to keep the dust from drifting away.
Solution
● Use a vibratory plate compactor to compact the subbase and pavement.
Mistake 7: Laying layers unevenly
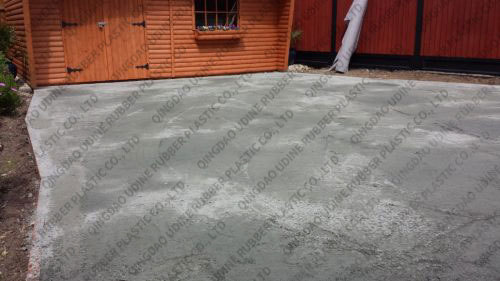
Not only is it necessary to use the correct form of aggregate and ensure proper compaction, but the final step in installing the plies is to ensure that the surface is completely flat before turfing.
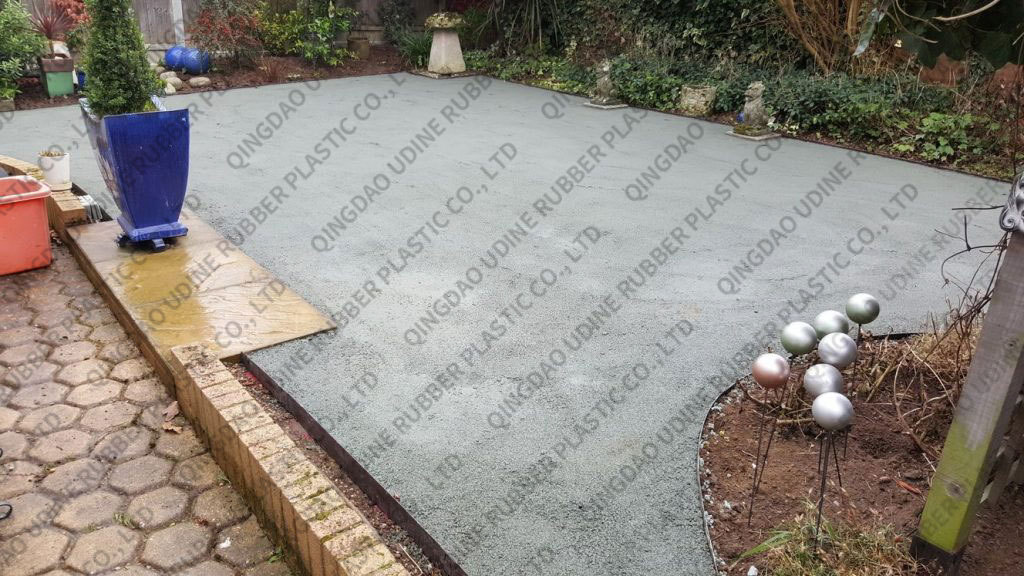
You will find that after running the slab compactor on the layup layer, it will leave small indentations in the aggregate. Before laying grass, it is important that you smooth out any ridges or protrusions. This can be done with a plastic float.
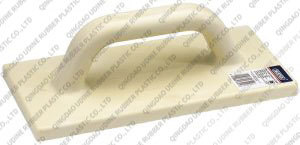
If you don't, you'll see them through the artificial grass as it will lay flat on them and take their shape.
Solution
● To avoid any unsightly ridges or bumps across your artificial turf, use a float to "iron" the artificial turf before laying it.
Mistake 8: Failing to install proper edge restraints
Another common mistake we see is failing to install edge restraints. Edge constraints are an important aspect of artificial grass installations for two reasons. First, they retain the subbase and lay layer, preventing the lawn from collapsing at the edge, and second, the edge restraint will give you an anchor point where you can secure the perimeter of the lawn. When it comes to choosing an edging material for your lawn, you have several options.
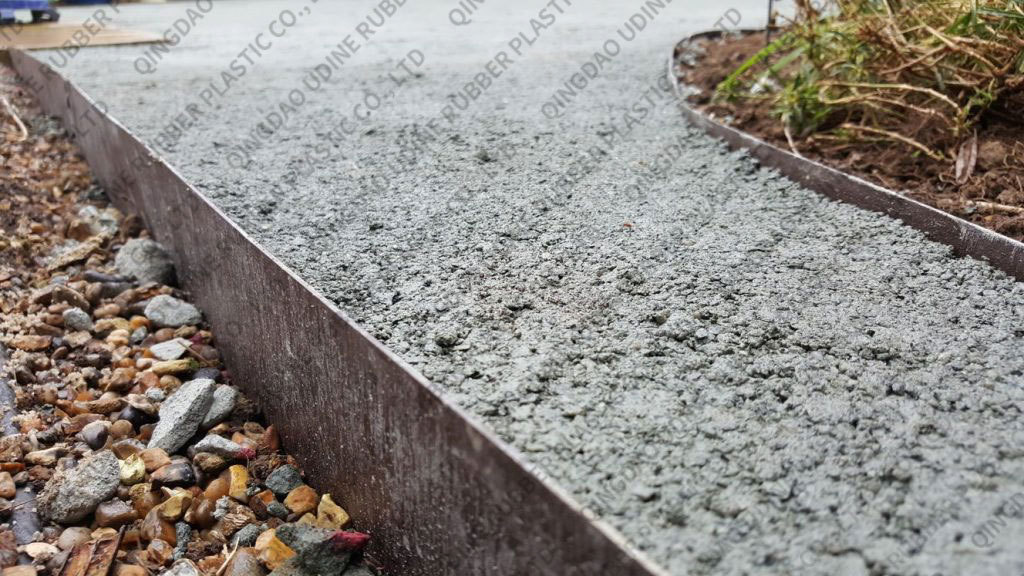
Treated lumber, plastic lumber, treated sleepers, concrete edging or metal edging systems will all do the job required. The perimeter of the lawn can be secured using galvanized nails (if using wood edging) or artificial turf adhesives such as all-purpose adhesive.
Solution
● Use a secure edgebanding system that maintains the sub-base and lay-up layers.
Mistake 9: Failing to adapt artificial grass to the environment
Another problem we often see when installing artificial grass is the inability to adapt the artificial grass to the climate. Many people forget this important step. The only feasible way to ship artificial grass is in rolls.
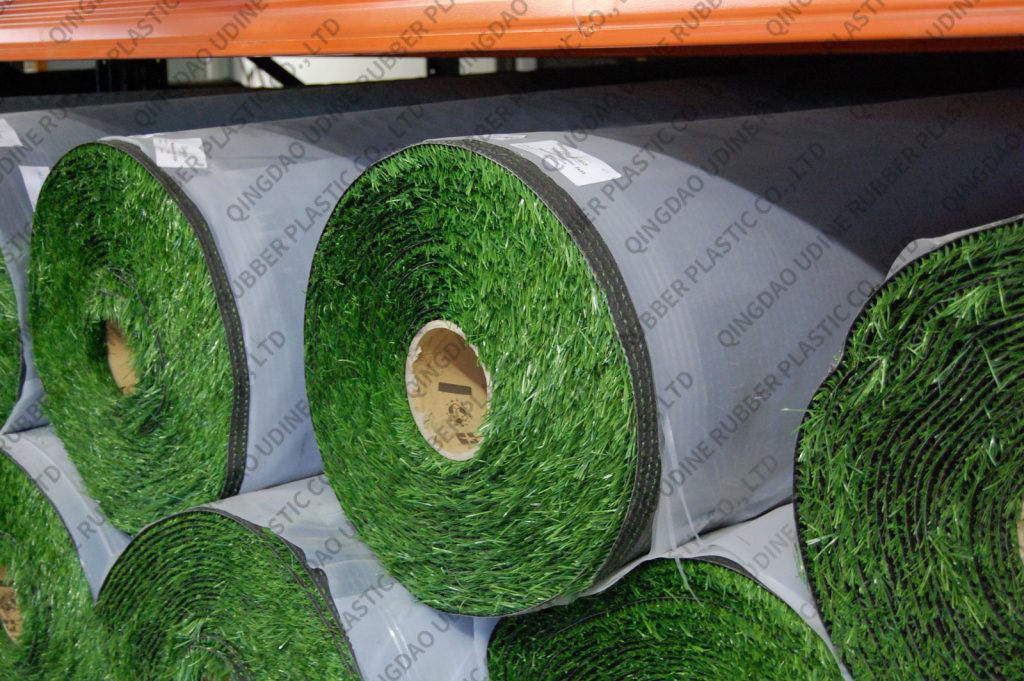
After rolling the artificial turf tightly onto the cardboard core, you need to unroll the artificial turf on the new lawn and let it sit for at least 24 hours to "acclimate". The adaptation process will make the grass easier to install. When first unfolding your artificial grass, there are usually some small ridges and ripples. This is due to the abrasion resistant backing which retains its shape. However, after 24 hours of spreading the grass, these ridges or bumps will naturally fall off, making it easier to lay the grass without any undulations.
Solution
● Spread out your artificial grass on your lawn and let it acclimate for at least 24 hours.
Mistake 10: Pile facing the wrong direction
On closer inspection, all artificial grasses have a slight pile orientation, i.e. the fibers of the turf all point in the same direction.

When joining two sheets of artificial grass together, it is important to ensure that the piles on both rolls of turf face the same direction. It is usually easy to spot because the green of the grass will look slightly different. If you don't face the grass in the right way, you can always see where the connection between the two pieces of grass is. Another tip is to make sure the stakes are oriented towards the angle that will view the lawn from the greatest angle. This usually means the pile is facing towards your house. This is because this side is generally considered the best viewing angle.
Solution
● When connecting two rolls of artificial grass, make sure the haystacks on each roll face the same direction to avoid visible connections.
Mistake 11: Connections are cut incorrectly
Artificial grass is supplied in 2m and 4m wide rolls. Due to the shape of the lawn, you may need to join multiple rolls together to cover it. For the uninitiated, this is where potential problems can occur if you don't follow the correct process. First, when you look at your artificial grass roll, you will notice a strip of film attached to the outer edge of the roll, known in the industry as a "selvedge." The selvage is used to thread the main backing through the sewing machine. Before trying to stick the two pieces of grass together, the selvage must be removed. Also, to ensure an invisible connection, you need to count 3 pins from the crimp and cut to close to the fourth pin.
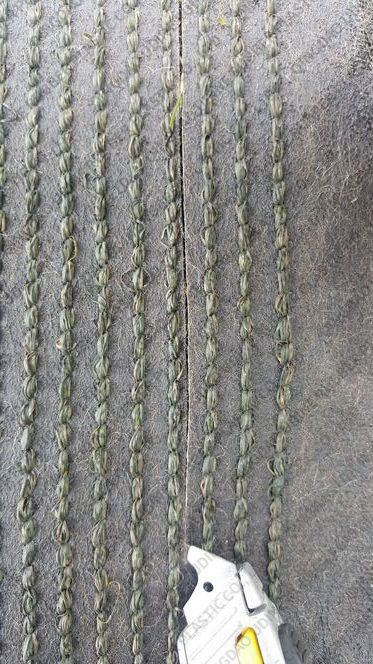
This is because the fibers on the outer edge fray outward and cannot naturally merge with another roll of grass. The rolls we offer are approximately 4.1m and 2.05m in order to remove the outer edge. If you don't do it well the first time, you can get a few more stitches if you have enough width.
Solution
● To ensure an invisible connection, cut 3 stitches around the edge of the artificial grass.
Mistake 12: Not securing joins sufficiently well
When joining two pieces of artificial grass, it is extremely important to ensure they are properly secured together to prevent them from coming apart. The best way to do this is to use joining tape and a professional artificial grass adhesive such as All Purpose Adhesive. Some manufacturers recommend using galvanized clevis pins to hold the joints together, but in our testing and experience this is not enough to create a strong, invisible joint.
Solution: Use joining tape and special adhesive to connect the two pieces of grass.
Solution
● Use joining tape and special adhesive to connect the two pieces of grass.
Mistake 13: Improper use of connecting tape
The connecting strip can be up to 100m in length and is placed between two pieces of sod. The width of the connecting tape is 300mm, first of all, it is important to make sure that it is rolled out so that each piece of grass can come into contact with and adhere to the tape.
You'll also notice a different texture on both sides of the tape. One side is smooth and shiny, the other is rough. To use the attachment tape correctly, make sure the rough side is facing up as this is the side you will need to apply the glue.
If the glue is applied to the smooth side, the adhesive will not adequately bond the artificial grass to the attachment tape.
Solution
● Make sure the rough side of the connection tape is facing up before applying the adhesive.
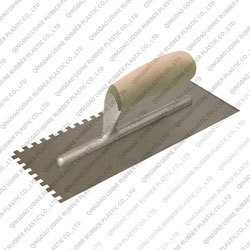
Mistake 14: Using too much or too little adhesive
It is also important to use the correct amount of glue when securing the connection. Use a notched floor trowel to apply about 2mm of adhesive across the entire width of the connecting strip.
Using too much glue can cause the adhesive to bleed onto the fibers, making it difficult to remove. Too little adhesive and your fake grass won't bond properly. To ensure proper bonding between the adhesive and the joining tape, place some weight along the join, for example, a bag of kiln-dried sand that should be prepared on site, to use as a filler. Bonus tip: If you get adhesive on the plastic fibers, use a small amount of white wine to remove it before it sets.
Solution
● Apply a 2mm layer of adhesive across the entire width of the connection tape.
Mistake 15: Failing to protect lawn edges
We talked about the need to install edging around the lawn earlier in the article. Not only does this preserve the aggregate installed under the fake lawn, it also gives you something to protect the perimeter of the lawn. Failure to do so will cause the grass to lift at the edges. For metal or concrete edge systems, you will need to secure the edge with a professional joining adhesive or galvanized clevis. For this, we recommend using 330ml cartridges instead of buckets of glue, as using the airbrush applicator allows for more accurate application. If you choose to secure the lawn edge with lumber or sleepers, you can attach the perimeter of the grass to the lumber with galvanized nails.
Solution
● Secure the perimeter of the lawn with galvanized nails, staples, or adhesive.
Mistake 16: Failing to install sand pack
This is a hot topic in the online world. Should sand treatments/fillers be installed?
The answer is yes.
There are several reasons for this:
- It adds ballast to the grass, preventing movement and ripples
-It supports man-made fibers
- It regulates the temperature of the grass
-It improves fire resistance
-Improved and regulated drainage
-It prevents static electricity
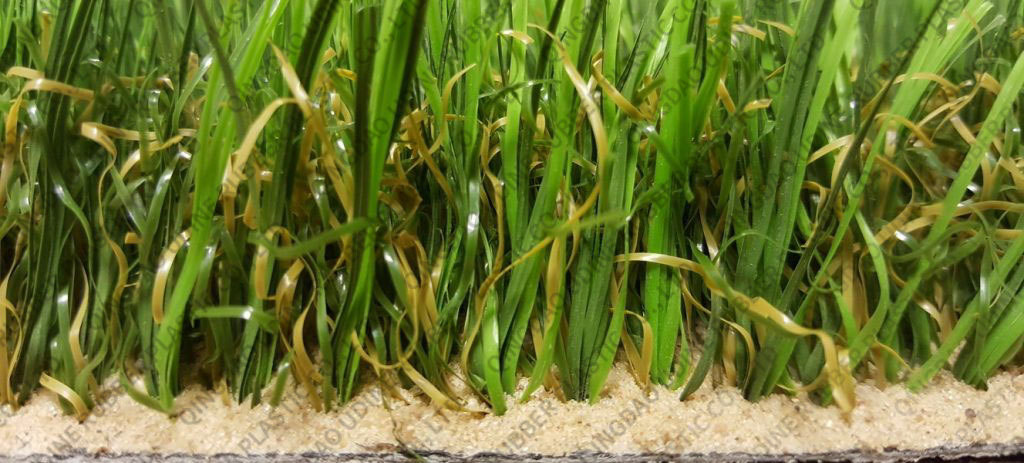
You may hear some people claim that this is unnecessary or that they have a 'non-filled' artificial grass, but fortunately, this type of product does not exist. It's just a marketing ploy to make the installation cost of the product look cheaper. The extra cost of installing the sand pack is certainly worth it. You can buy bags of kiln dried sand from your local DIY store for just a few pounds each.
Solution
● Install sand infill on artificial turf.
Mistake 17: Failing to brush the lawn
The last task when installing artificial grass is to brush the turf with an artificial grass rake, stiff broom or mechanical brush. This allows the sand filler to fall to the bottom of the pile, so it sits on top and helps protect the latex backing. This also means that the fibers will stand upright, making the grass look more realistic.
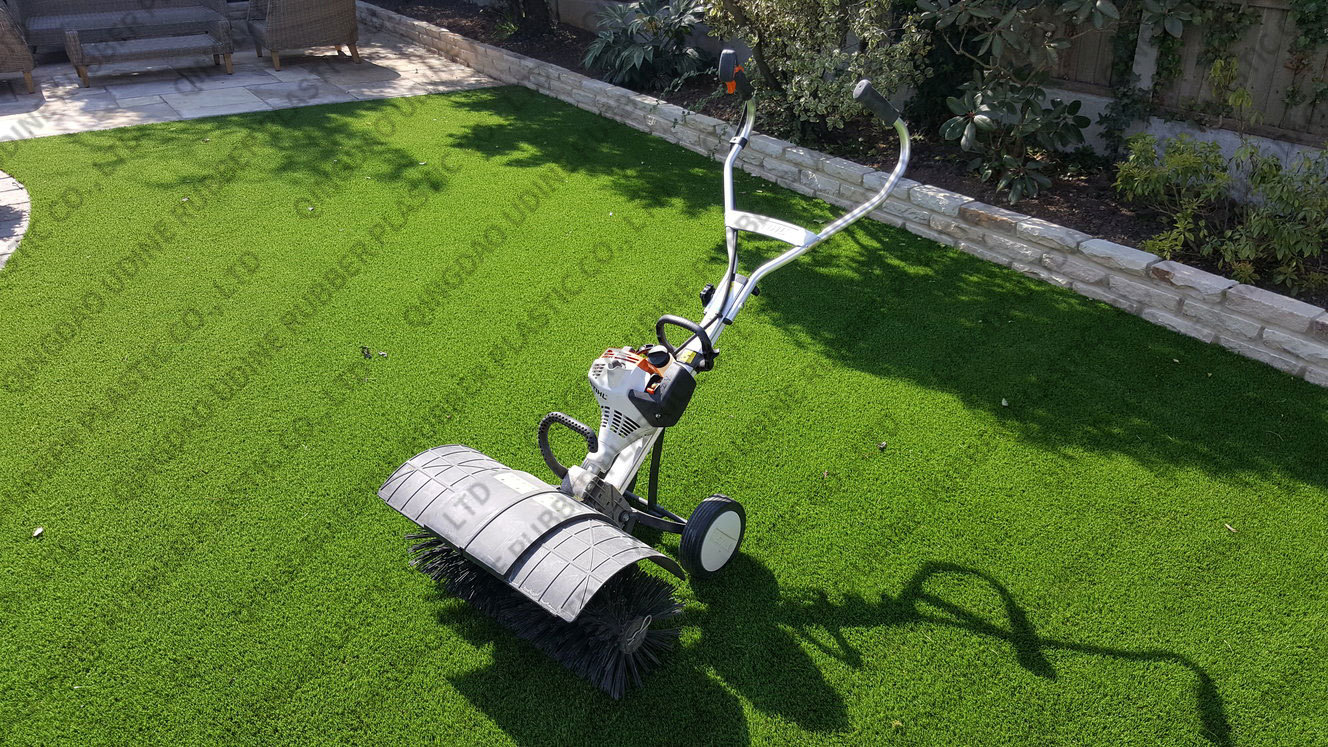
If you don't brush the sod, the sand filler will sit on top of the fibers, flattening it out. It also means that protection from sharp objects -- including dog paws, if you have a pet that likes to dig -- will be lost, meaning the latex backing could be torn. Bonus tip: Make sure you don't use a brush with metal tips, as this can damage the fibers.
Solution
● When you've applied the sand fill, brush the lawn to make sure it drops to the bottom of the pile.
Mistake 18: Choosing inferior artificial turf
Our last error wasn't really an installation error, but it could still be a devastating one. Choosing the best artificial grass is not an easy task, especially when you consider the vast array of stack heights, colors, materials, and manufacturing processes used to create artificial grass. As with anything, you get what you pay for, and if you want a realistic artificial grass that will stand the test of time, you're better off avoiding the cheaper products on the market.
Solution
● To avoid disappointment, please contact us and choose high quality artificial grass.
At the end
As we said at the beginning of this article, your artificial turf will get a better, longer lasting finish if installed by an experienced professional installer. If you consider that your artificial turf is likely to last longer and perform better, the extra cost involved in having it installed by an experienced professional installer may be a worthwhile investment. Professionals will also remove many of the potential stresses that can come with installing artificial grass. They will be able to handle everything from start to finish and advise you on the product that best suits your needs.
However, if you plan to go ahead with the DIY installation, then hopefully you found this article useful in helping you avoid potential pitfalls.
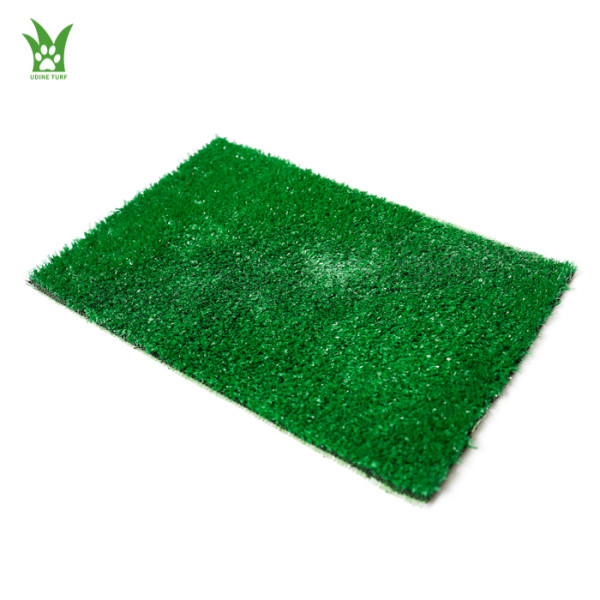
● 10MM Landscaping Grass
● Density : 16800/SQM
● Excellent UV resistance
● Provide 3-5 years of quality assurance
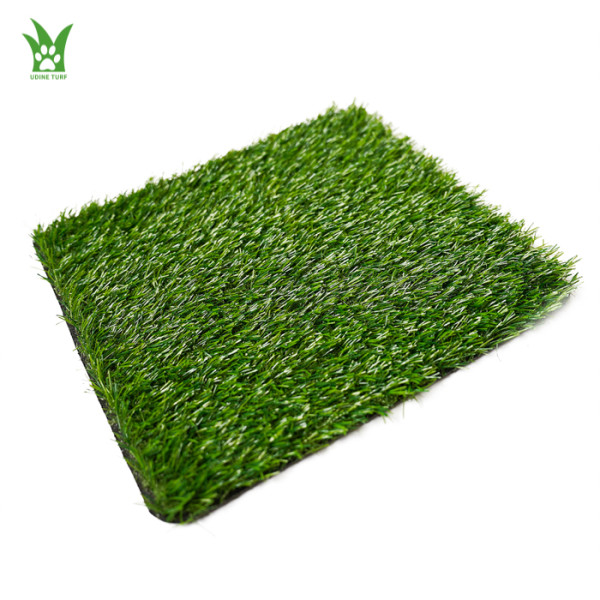
● 20MM Landscape Synthetic Lawn
● Density : 16800/SQM
● Excellent UV resistance
● Provide 3-5 years of quality assurance
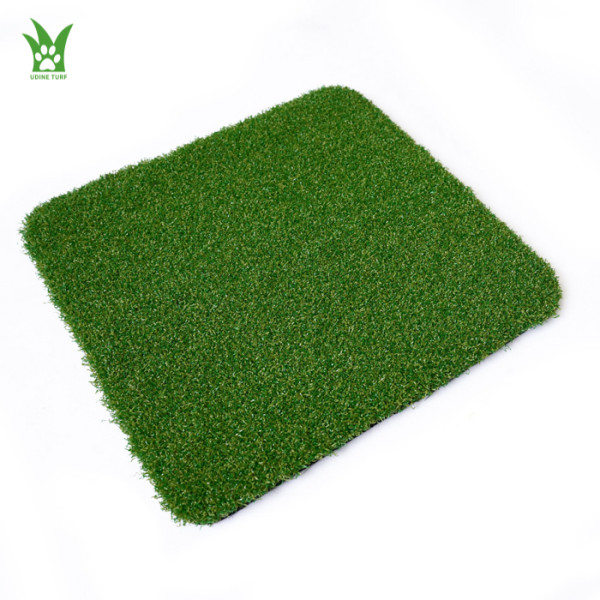
● 16MM Real golf grass feeling.
● Low maintenance cost.
● Excellent UV resistance
● Provide 3-5 years of quality assurance
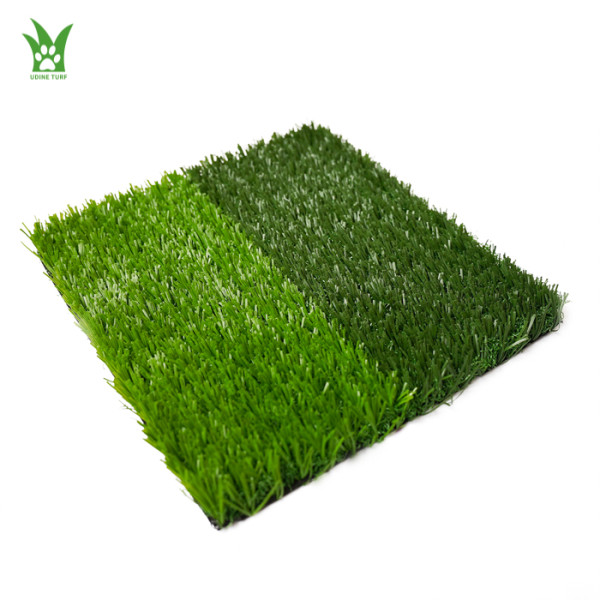
● 30mm football turf without filling.
● Low overall cost.
● Excellent UV resistance
● Provide 3-5 years of quality assurance